The interaction system consists of the following parts:
- Base interface:
BI_Pressable(used to trigger button interactions) - Doorbell base class:
BP_DoorbellBase(baseline implementation of a pressable actor) - Message receiver
BP_ExampleReceiver; - Example message receiver:
BP_ExampleReceiver - Doorbell actors:
BP_Doorbell01throughBP_Doorbell12 - A character controller that initiates the interaction
Usage:
- Place a selected doorbell blueprint in your level.
- Set up how the player interacts with it. One example using line traces is included in
Content/VRS_Doorbells/Demo/Blueprints/BP_DemoFPSCharacter. - Create a blueprint to respond to the interaction. A sample implementation is provided in
BP_ExampleReceiver.
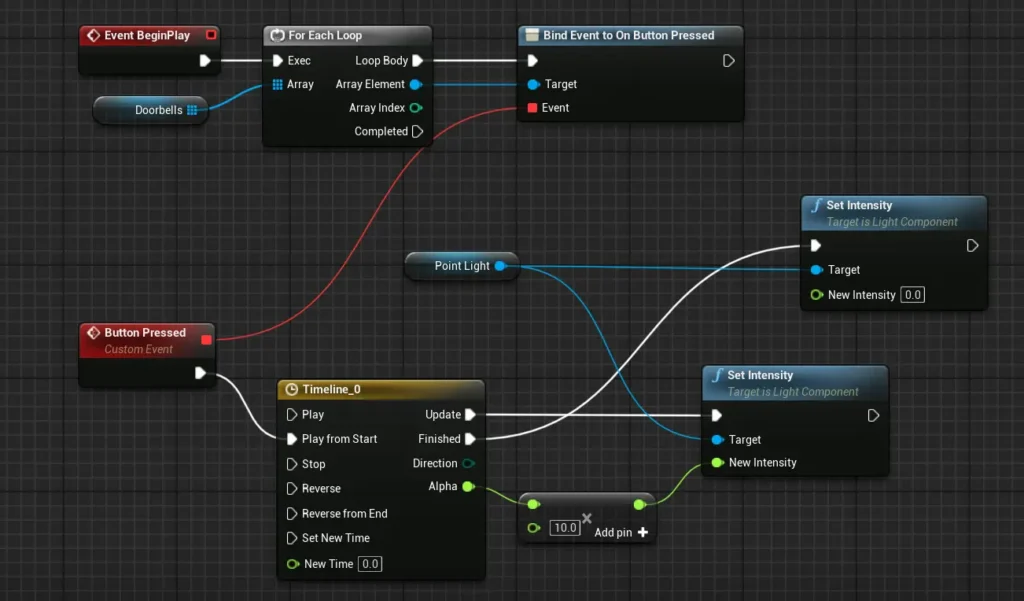
The receiver reacts to the OnButtonPressed event. In the example, BP_ExampleReceiver binds this event to any number of doorbells placed in the level added to the array of doorbells, and adjusts the intensity of a point light to show the interaction occurred.
Adding new door bells
There are two ways to add a new doorbell:
- Edit a placed instance of an existing doorbell blueprint directly in the level.
- Create a child blueprint class of
BP_DoorbellBase.
Both methods require replacing the mesh for the button and the base. Depending on pivot placement, you may also need to adjust the button’s position.
You’ll also want to adjust a few properties to match the mesh and behavior:
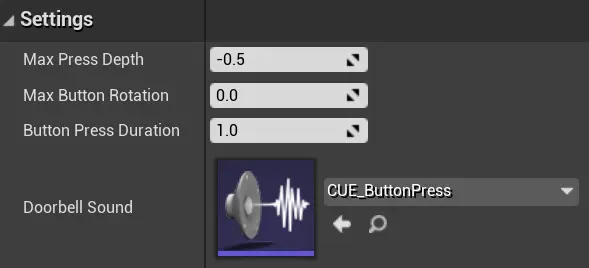
- For simple pressable buttons, you can configure the interaction area and animation settings like so:
- To make a button rotate when pressed, set
Max Button Rotation:
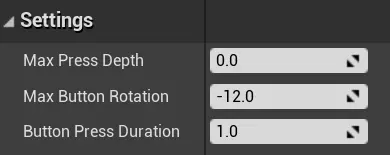
- Use
Button Press Durationto define how fast the button animates when pressed. Default is 1 second.
You can assign custom sounds for button presses in the blueprint’s settings.